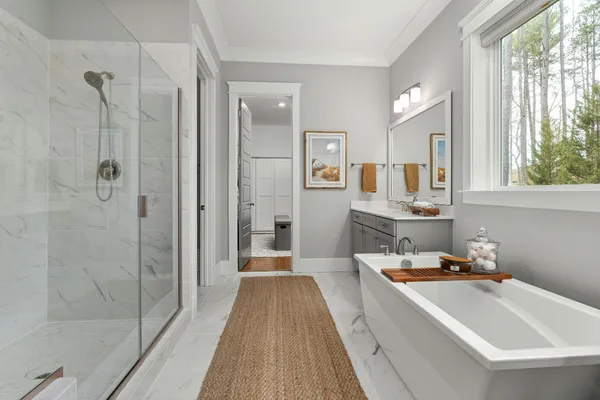
How to Plan a Bathroom Remodel Without Making Expensive Mistakes
A bathroom remodel is one of the most satisfying home improvement projects you can do. It is also one of the easiest to get wrong, and getting it wrong in a bathroom is particularly unforgiving because the room is small, the materials are expensive, and everything connects to everything else.
I have owned multiple homes and navigated my share of renovation projects. I also oversaw a $10 million development project in my previous career. What I know now that I did not know the first time is that the sequence matters as much as the vision for the project and the selection of materials. You can choose beautiful tile and still end up with a bathroom you hate if the work was done in the wrong order or if you replaced something that could have been refinished for a fraction of the cost.
This post covers both the right order to tackle a bathroom remodel and how to decide what actually needs to go versus what can be saved.
CONDUCT AN ASSESSMENT BEFORE TOUCHING ANYTHING
The most expensive mistake in a bathroom remodel is starting demolition before you understand what you actually want to achieve with the remodel. Spend time looking before you start pulling.
Check the subfloor. This is the single most important thing to assess before anything else. Water damage to a subfloor can double your project cost overnight because it has to be addressed before any new flooring goes down. Look for soft spots, discoloration, or any give when you press down near the toilet base, around the tub, and under the vanity. These are the areas where water consistently finds its way in over time.
Check the walls behind the tile or drywall in the wet areas. If your existing tile is intact with no cracked grout and no soft spots behind it, that wall may be fine. If there is any flex or hollow sound when you tap it, or if grout lines have been filling with mold despite regular cleaning, the substrate is likely compromised and needs to come out.
Check what is original. Older homes in the Lower Hudson Valley in places like Westchester, Rockland, and Orange Counties, sometimes have cast iron tubs that are structurally sound but cosmetically rough. Cast iron is incredibly durable and worth keeping if the structure is good. The same applies to solid wood vanities that just need refinishing and solid chrome fixtures that are dated in style but functionally fine.
The outcome of this assessment determines the project's scope and serves as a budget planning tool. Know what you have before you commit to what you want.
REPLACE OR RESURFACE: THE DECISION THAT SAVES YOU THOUSANDS
This is where most homeowners either save significant money or waste it, depending on what they know going in.
A cast iron or steel tub in good structural condition with no cracks, no rust penetrating through, and no chips down to bare metal can be professionally reglazed for roughly $300 to $600 for properties in the Lower Hudson Valley. A replacement tub plus the labor to remove the old one and install the new one can run $1,500 to $4,000 or more depending on the material and how much tile work surrounds it. These are estimates. The final price depends on several factors that cannot be covered in this post. If the tub is structurally sound, resurface it.
Tile that is in good condition but the wrong color or dated in style can sometimes be painted with epoxy tile paint as a temporary measure, though this is not a permanent solution. If the tile itself is cracked, hollow behind it, or mold has gotten into the grout consistently, it comes out. Paint buys you time. It does not fix a substrate problem.
One note I want to make when buying tile and other materials for home remodels is that you get what you pay for. I replaced the tile around the tub in a home I owned back in 2001. Someone recently told me the home was for sale, so I looked it up. While a lot has changed in 25 years, the one thing that stood the test of time was the tile around the tub. Based on the photos on Zillow, the tile is still in good condition.
Vanity cabinets with a solid wood base that is structurally intact can be refaced or repainted. Replace the doors, update the hardware, and refinish or paint the box. Done well, this looks like a new vanity at a fraction of the cost. If the box is particle board that has swollen from moisture, it goes.
Toilets are not generally refinished. If it works, keep it. If it is running, constantly requires adjusting, or is cracked, replace it. Toilets are one of the more affordable replacements in a bathroom and a new one makes the whole room feel cleaner.
Fixtures like faucets, shower heads, towel bars, and toilet paper holders are almost always worth replacing because they are relatively inexpensive and make an outsized visual difference. Swapping out dated brass fixtures for brushed nickel or matte black costs a few hundred dollars and changes the entire feel of a room.
THE RIGHT ORDER TO REMODEL A BATHROOM
This is the step many homeowners get wrong and it almost always costs them additional money to fix. Every contractor you hire should be working within this sequence. If they push back on the order without a specific structural reason, that is worth a conversation before they start.
Step One: Demolition and rough inspection. Remove everything that is leaving, such as old tile, the vanity, fixtures, and the toilet if it is being replaced. Once the walls and floor are open, you get your real assessment. This is when you find the subfloor damage or the mold behind the wall that was not visible before. Do not order materials in bulk before this step because what you find may change your selections.
Step Two: Plumbing rough-in. Any changes to drain location, supply lines, or shower valve position happen now, before walls are closed. Moving a drain is invasive work that requires access to the subfloor. If you are adding a second sink, relocating the toilet, or changing the shower configuration, this is the only time to do it without tearing the room apart twice.
Step Three: Electrical rough-in. Adding a new circuit for a heated floor, relocating an outlet, adding recessed lighting, or installing an exhaust fan with a separate timer switch happen while the walls are open. Exhaust fan placement matters more than most people think. It should be positioned to pull air from the shower area, not from across the room where it is venting air that has already cooled and dried. GFCI outlets (Ground Fault Circuit Interrupter) are required in bathrooms. This is the time to install them.
Step Four: Cement board or tile backer in wet areas. Regular drywall does not belong in the shower or tub area. Cement board, HardieBacker, or a similar moisture-resistant backer goes on the walls in any area that will receive tile in a wet zone. This step is not skippable, and if a contractor suggests it is, find a different contractor.
Step Five: Waterproofing. Before any tile goes up around the shower or tub, the substrate needs to be waterproofed. This means either a liquid-applied membrane or a sheet membrane, depending on the system being used. Pay attention to the corners and the seam where the floor meets the wall because these areas most often reveal problems. A properly waterproofed shower should be flood-tested, meaning the drain is plugged and the area is filled with water for 24 hours before tile is installed. Not every contractor does this. The ones who do are worth keeping.
Step Six: Wall tile (upper rows). Most of the wall tile goes up first, leaving just the bottom row blank. Tiling the walls before touching the floor protects your new floor tiles from heavy dropped tools, wet mortar, or accidental chips during installation.
Step Seven: Main floor tile and final wall row. Once the upper wall tile is set, the entire floor goes down—both inside the shower and across the main bathroom area. After the floor tile sets, the bottom row of wall tile is installed so it neatly overlaps the floor edge. This guarantees a level floor for your vanity and toilet, while keeping water from seeping into the wall joints.
Step Eight: Vanity and plumbing trim-out. The vanity goes in after flooring is complete so it sits on top of the finished floor. This matters for two reasons. It looks cleaner and it means the vanity can be replaced in the future without pulling up tile. Plumbing trim-out, meaning the installation of faucets, shower valve trim, and supply lines, happens at this stage.
Step Nine: Toilet. Last fixture installed. The toilet sits on top of finished flooring and is connected at trim-out. Installing it earlier creates a working obstacle in a small space and risks damage to a new toilet during the rest of the project.
Step Ten: Accessories, mirrors, and lighting. Towel bars, toilet paper holders, mirrors, and light fixtures go in last. Paint touch-ups happen here too. These are the details that make the room feel finished.
ONE THING MOST HOME RENOVATION GUIDES DO NOT MENTION
Sequencing your contractor visits matters as much as sequencing the work. Your plumber and your electrician both need to rough in before walls close, but they rarely need to be there at the same time and scheduling them back to back without a buffer day between them is a mistake. If the plumber runs into something unexpected, and they often do, you do not want to schedule your electrician to arrive the next morning into a space that is not ready for them. Build one buffer day between every trade to save yourself a lot of headache.
Also, do not let anyone caulk the tub or shower until the room has been at normal operating temperature for at least 24 hours. Caulk applied in a cold or damp environment during construction cures differently than it does at normal living conditions. It shrinks, pulls away at the edges, and fails earlier than it should. This is a small detail that matters for the long-term performance of the waterproofing.
My remodel projects never had issues when I knew the sequence. The remodels that cost me the most time and money were the ones where either I or the contractor failed to follow the scheduled sequence. Take the time to plan your remodel right. Your bathroom will thank you for years.
Also, be willing to be flexible with your vision and desired materials. Once you start stripping the walls away and removingfixtures, it is rare not to find unexpected issues that must be addressed before moving to the next stage.
I have been through my share of remodels as a homeowner. Nothing in this article should be construed as professional advice. Seek out guidance from a licensed contractor. If you need a contractor for your remodel and you are in Westchester, Rockland, or Orange County, New York, browse our directory of Home Remodeling and Renovation contractors at lhvcommunityhub.com.
Michele Davis
Founder, Lower Hudson Valley Community Hub
Owner, Gemstone Consulting Services